
|
To view the allocated visits for a Client, select the appropriate Worker and then click on the Visit Schedule menu. A new window will open displaying the visits.
This window is divided into two tabs. The tabs are as follows:
Browse
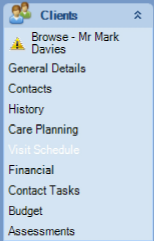
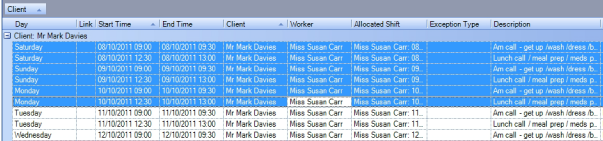
The Browse screen displays visits in a list for a specified date range. Visits can be edited and added here.
To view the visits, set the date range to show the required period.
![]()
Enter Dates from and to, either by free typing or selecting from the drop down calendar
Click 'Refresh'
The Visit Schedule screen view defaults to Day and Date order. This view can be altered depending on the information required. To alter the default layout, the column headers can be moved by dragging and dropping. Left click and hold the mouse button down, drag the header into the light grey box called 'Drag a column header here to group by column', then release the mouse button. In this example the visits are now ordered by Client.
Calendar
The calendar view allows you to view the selected Client visits, add extra visits, edit individual visits or delete visits.
Visits can be viewed by month, week or day.
Month -
The default setting is the month view. The month can be changed backwards or forwards by using the scroll bar on the right of the window.
Week -
To view the visits in any given week, select a date during the relevant week within the month view and click on the 'Week' tab. This will open a new window displaying the Workers visits during that week.
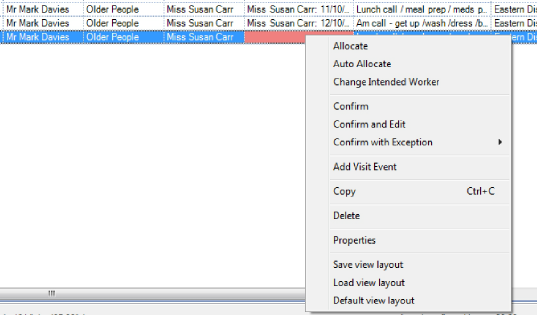
Allocating a Worker
To allocate a Worker to a visit, right click on the visit and select 'Allocate'.
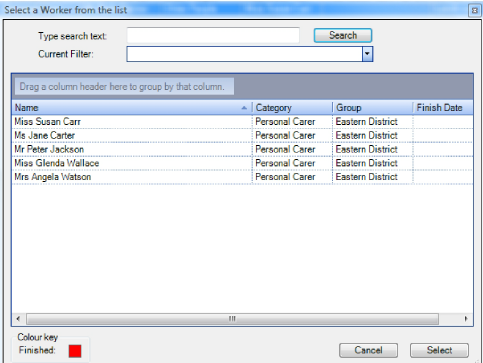
A 'Suitable Workers' list will open.
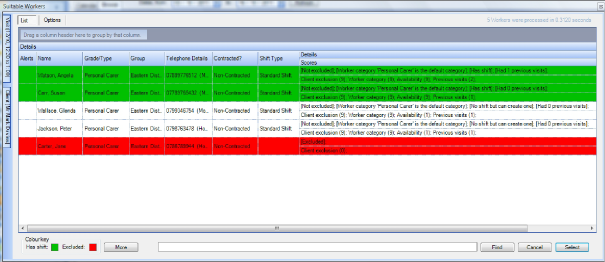
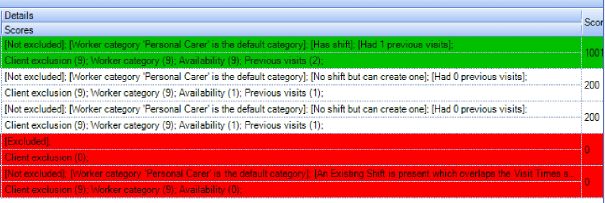
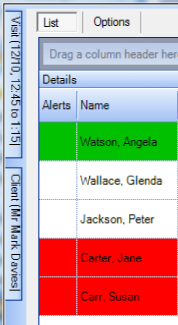
When searching for a Worker, the results screen will show Workers in one of three colours.
Green The Worker is available and has a gap in their schedule to accommodate the visit
White The Worker does not have a shift, but one could be created
Red The Worker is unable to complete the visit
The search results are also ordered by default checks.
1. Group This will match the Worker and Clients group
2. Exclusion Is the Worker excluded from the Client?
3. Worker Category Does the visit require a specific type of Worker
4. Available Worker availability
5. Previous visits How many previous visits a Worker has completed for this Client
Double left click on the Worker to allocate or highlight the Worker and click the 'Select' button found at the bottom right of the window.
There is a search function found at the bottom of the screen. It is important that you click on the 'Find' button and not press enter on the keyboard.
To search, type in the Worker name and click 'Find', the screen will refresh and the Worker will be visible.
Alert Column
This will display an alert entered against a Worker
There two other key features of this screen;
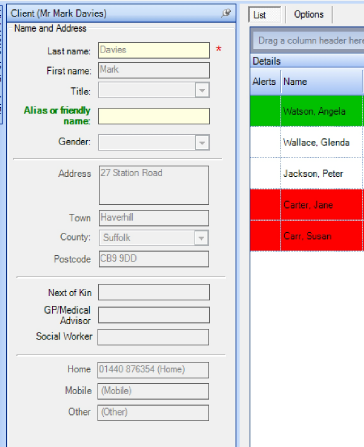
1. The Client General Details
2. The Visit Details
To view the information, hover over the relevant tab
The tab will expand and slide out to view the Client's general details, next of kin and other contact information. To hold the screen open, click on the pin icon. Both tabs can be viewed together.
De-allocating
To de-allocate a worker from a visit, right click on the required visit and select 'De-allocate'. Click 'Yes' to the prompt to de-allocate the worker. If 'No' is clicked, the request to de-allocate will be cancelled.
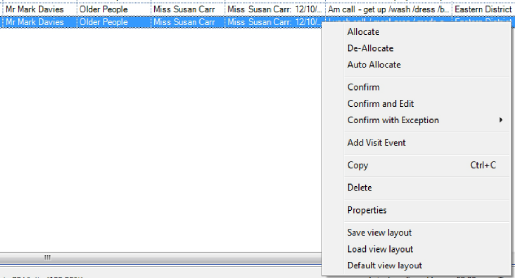
Once de-allocated, the visit is displayed in pink.

Change Intended Worker
Upon allocation, if a Worker is shown in red and cannot be allocated, but is required to complete the visit, the Worker can be used by right clicking on the visit and selecting 'Change Intended Worker'.
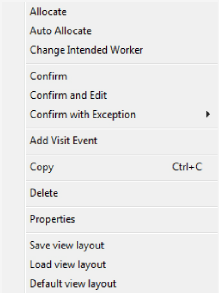
The 'Select a Worker' screen will then be displayed.
Select the Worker and then click on 'Select' at the bottom right.
This will change the Worker in the Worker column and the visit will now show within the new Worker's visit schedule. From here the visits can be moved to accommodate allocation of this new visit.
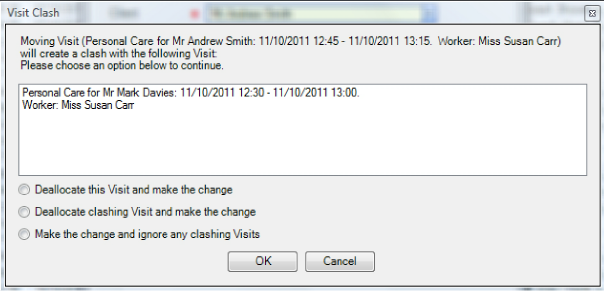
Clashing Visits
To view a clashing visit or to see why a visit will not allocate, order the screen view by the Worker column.

Check the start time and end times of the visits below and above, one of the times will be overlapping.
To manage the visit clash, the start time of one or more of the visits will need to be edited.
Editing the Start Time of a Visit
To edit a visit, double left click on the visit to open the 'Visit Properties' box, click in to the 'Preferred start time' box and type in the new time, then press the 'tab' key or click out of the box. This may alter the earliest and latest start times for the visit. Two flashing icons will be displayed, if the start time has moved outside of the allowed latest/earliest stat times. Click 'OK' to complete.
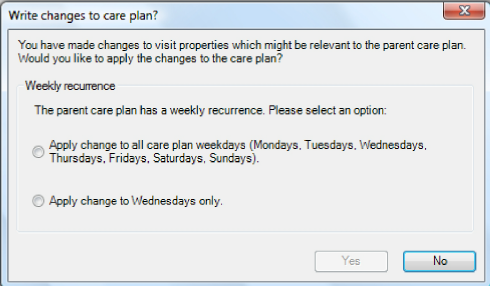
Write changes to care plan?
To make the change permanent, select 'apply change to...' either all the days displayed or just for the single day. This will then make the 'Yes' button available to write back to the care plan which will make the change plan permanent. If 'No' is clicked, the change will be for this visit only.
De-allocating a clashing visit
When a visit clashes with an existing visit, select the visit to be de-allocated, by clicking the relevant option
De allocate this Visit and make the change
De allocate the clashing Visit and make the change
Make the change and ignore any clashing Visits (Do not Use This Option)
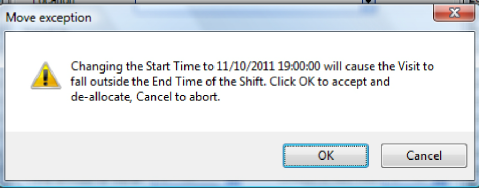
A visit falls outside of a shift
If the visit time is moved and causes the visit to fall outside of the Workers shift, click 'OK' to accept and de-allocate, or select 'Cancel' to reverse the changes.
CANCELLING A VISIT
A visit can be cancelled from the following 3 locations.
Worker Visit Schedule
Client Visit Schedule
Work with Visits
How To Cancel a Visit
To cancel a visit, first de-allocate the worker and then right click on the visit that requires to be cancelled. Then select 'Confirm with Exception'.
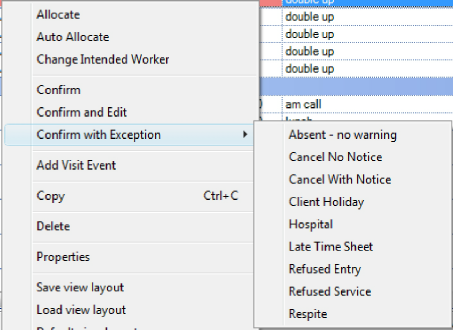
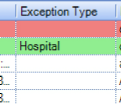
Select the exception reason from the list presented. The exception reason will dictate the pay and charge for the cancellation.
Once the reason is selected, the visit will then
turn a pale green. 
The reason exception reason will also be displayed in the exception type column.
How To Cancel Multiple Visits
To cancel more than 1 visit, first select the date range for the visits and then select the first visit and hold down the 'Shift' key, then select the last visit. The selected visits will then all turn blue, right click and select 'De-Allocate'.
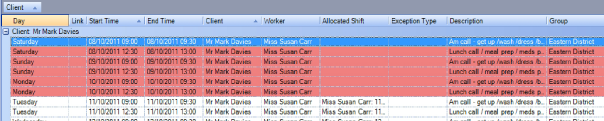
Repeat the selection process, right click on the blue highlighted list and select 'Confirm with Exception', then select the exception reason.
